Thursday, February 28, 2013

And the winners are......

We want to thank everyone who entered the Drills and took part in the Basic Training. We spent a lot of time going through each and every entry, and were so impressed with the submissions! We hope that you all enjoyed our first month here at S.W.A.T., and that you will all join us again in March.

But first, lets celebrate this month's winners!


 Drill# 1, All About Me, the winner is:


Julie please contact us with your mailing information to collect your Bo Bunny Prize Pack.

 Basic Training, ribbon rosette, the winner is:
Lydia please contact us regarding being our
first Featured S.W.A.T. Girl!

 Drill #2, Sketchy Saturday, the winner is:

Patty, please contact us with your mailing
information to collect your Scrappy Prize Pack.

Thank you all again for sharing your amazing
talent with us! We hope that you had fun!

Make sure you come see us Saturday for our next Drill!
 
Please contact us by email at: swatscrappygirl@gmail.com
 
All prizes must be claimed by March 15th


Saturday, February 23, 2013

Fair Winds and Calm Seas


Scrap O' Luck
Today's Special Ops training is a little something to get you into the mood for St. Patrick's Day, that super fun holiday that has come to mean four-leaf clovers, leprechauns, and green beer. And what better way to celebrate this lucky day than a Sailing Ship that is all decked out for "the wearin' o' the green."
 
Don't let these pretty pieces of wood and paper intimidate you.
The step by step instructions are a cinch!

Supplies:
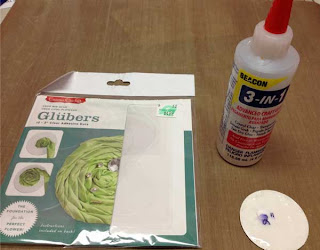
Art Minds wooden puzzle: Military Sailing Ship
{I purchased mine from Michael's}
5 sheets patterned cardstock
Acrylic Paint
Twine
Rubber Cement
Glossy Accents
Craft Knife
Large Needle
Step 1:Purchase this Ship Kit
Step 2:Color the pieces as shown in the following schematic.
This schematic is included in the kit.

Step 3: On the back of each wooden sheet of puzzle pieces, label each piece using a ball point pen.
Step 4: Very carefully punch each piece out. Keep in mind the pieces are fragile and will separate in layers or splinters if you are not VERY careful.
Step 5: Use the color clues in the above schematic to complete steps 6 through 9. Each color is a different piece of patterned cardstock. On the "Scrap O' Luck" I used the following colors of patterned paper for each color represented above:
Blue --- white with sparkle green pattern
Purple --- Solid black with a flourish
Yellow --- Black and Green polka dot
Orange --- Green polka dot
Green --- News Print
Orange and Green were made out of the same pattern of double sided paper. The Orange were traced on one side and the Green on the other.
Step 6: Orange and Green pieces are sails. Use different pieces of patterned cardstock for each color. Be aware that the sales will be seen from both sides so use double sided paper that compliments your ship theme. The first and third set of sales are colored orange in the above schematic.
Step 7: Four of the puzzle pieces will be covered with patterned paper on both side. Those are indicated with arrows.
Step 8: The remaining colored pieces will have paint on one side and paper on the other.
Step 9: The pieces without any color will be painted on both sides, but will not be covered.
Step 10: Paint sides and edges of all the puzzle pieces, let dry. One coat of paint is fine.
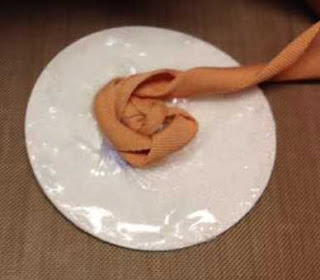
Step 11: Trace puzzle piece onto wrong side of patterned paper with painted side face up, cut out, and adhere. I prefer to work with Rubber Cement, but I am sure Mod Podge would work fabulously.
Step 12: Follow the step by step instructions included with the ship to assemble the pieces. Have your craft knife ready to trim the edges of the wood joints or of the paper. I found that many of my pieces looked like this before the ship would fit together properly:
Any places that I over cut or roughed up I camouflaged with ink. In a few places I broke the thin wooden pieces. These I re-attached with Glossy Accents.
Step 13: Because you are adding paper to many of the pieces the actual width will change. The pieces will not fit in the same way and some will not fit at all. I had the following pieces left over.

Step 14: If you plan to glue the ship, put it together without glue first to be sure you know where each piece will go and if you will need to leave any pieces out.
Step 15: Replace the string included in the ship kit with twine. Rig the sails as per the instructions.
Step 16: You have made a beautiful piece of art, display it with pride!

~Captain Charity~


Saturday, February 16, 2013

Sketchy Saturday!

We all get stuck from time to time so there is nothing better than a sketch to help pull you out!
 
This is a one of a kind sketch from our very own Jenessa. For this weeks drill use this sketch to inspire your project!!


To get you motivated to create we are offering this beautiful prize pack!


And just to get you started check out the beautiful projects the S.W.A.T. has created to share with you! 

Alison


Make sure you link your project up here by the 25th!


Saturday, February 9, 2013

Basic Training

 
Hi!  Today's Basic Training is this cute "ribbon rosette".  We all have a bunch of ribbon just waiting to be used!  These rosettes are super easy to make, and can be such a cute element on any page! 

To get started, you will need:
  • Cardstock (any color or scrap will do, it will be covered up)
  • Circle punch (I used a 2" circle punch for mine, but any size would work)
  • Glue (I use Beacon 3-in-1)
  • Scissors
  • 24" your choice of ribbon - colored on both sides - (some of my ribbon is colored on one side and white on the other )
Great! Let's Get Started:

 I purchased these glubers at Hobby Lobby and paid $4.99 for a package of 12. They are Clear adhesive dots, that are sticky on both sides. They are easy to use, however, pretty costly.  Instead, I use my circle punch and glue!  :)

1. Punch your circle and coat the top with your glue. I let mine set for a little bit to get a tad dry and tacky.
  
2.  Tie a knot on the end of your ribbon, and push onto the center of your circle.


3.  Twist and press the ribbon onto the circle.  Keep doing this until you reach the edge.


 4.  Once you have completed the circle, cut off excess leaving a tail.  Put a small dab of glue on the back and glue the tail to the back.  If you have any cardstock showing, you can just trim that off.


Voila!  You're done, and you have a beautiful rosette to put on your page!  You can also add buttons or bling to the center.  I added a pearl to the center of mine. 


Here is my layout with my newly created rosette:
 
 
We would love to see the rosettes that you have made!  Submit a project showcasing your rosette, for a chance at becoming our featured S.W.A.T. girl.  One winner will be chosen from all of the entries.  Be sure and link up your project using Mr. Linky.  Have fun! 

~Melinda


Saturday, February 2, 2013

DRILL # 1 -All About You!

 
Flip that Camera Around,
This Drill is all About You!
Most scrappers find that one of the hardest subjects to scrap is themselves.  But here at SWAT we are all about motivating you to advance out of your comfort zone! So suit up, load your ATG, and take a shot at this drill all about you!
 
Drill#1
Is all about you; create a layout that sole focus is you!
And to help motivate you a little bit more, here is the fabulous prize that's up for grabs for our first drill!
 
To get you started let's see what the S.W.A.T. ladies came up with for this drill:
Lisa


And don't forget Basic Training is Next Saturday don't be late!
 
Now let's see your layout all about You!
Link your layout up below by February 25th at 11:59 PM. EST.

Friday, February 1, 2013

Sneak Peek!


One more day!!!
Are you ready!
I know we are!
 
Here is a sneak peek
of what we have in store
for you tomorrow!
 
Thanks for stopping by today!
 See you Tomorrow!